
How to Measure Your Chiller for a Guardrail Enclosure
Every chiller guardrail project that stalls, stalls at measurement.
The most common reason a chiller guard project sits on a facility manager's desk is not budget. It is not approval. It is measurement uncertainty. Facility teams tell us they are not sure what data we need to scope the system, so the project waits.
Most guardrail vendors respond to that uncertainty by scheduling a site visit. Dakota Safety responds with a worksheet. Five measurements, one tape measure, twenty minutes.
Quick Answer: To measure your chiller for an EquipGuard guardrail enclosure, you need five inputs: the chiller's make and model, the unit's overall dimensions, the location of every service access point a technician needs to reach, the placement location for the integral ladder, and photos of all four sides plus the nameplate. The EquipGuard system mounts to the chiller's structural frame, so roof-deck measurements are not required. Send your worksheet and photos to Dakota Safety and you will receive a configuration and quote within 48 hours.
Why Measurement Is the Step That Matters
OSHA's general industry standard 29 CFR 1910.28(b)(1)(i) requires fall protection for any walking-working surface 4 feet or more above a lower level. When a technician climbs on top of a chiller to service a fan motor or open an access panel, the top of that chiller becomes a walking-working surface. At 8 to 10 feet above the roof deck on a typical unit, every chiller-top service call triggers the standard.
The hazard is not the roof edge. The hazard is the 9-foot climb to the top of the unit.
Fall protection remains at the top of OSHA's FY 2025 most-cited standards list. Penalties run up to $16,550 per serious violation and $165,514 for willful or repeated violations.
EquipGuard is purpose-built for each specific chiller. Some bracket spacings are standardized, but the system is not modular in the ballasted-guardrail sense. Several support pieces need to be cut to custom fit the unit's geometry. This is why accurate measurements matter. They drive the design, the cut list, and the placement of every support bracket and structural attachment.
How EquipGuard Mounts to Your Chiller
Before measuring, understand what the system actually does.
EquipGuard mounts mechanically to the chiller's existing structural frame, not to the roof. The brackets attach to factory-rated structural rails. The system does not penetrate the roof membrane, does not penetrate the chiller casing, and does not require ballasted bases sitting on the deck. This is why the measurements we need are about the chiller itself, not the surrounding roof area.
On rooftop installations, the rail attaches below the chiller's vibration isolators, allowing the unit to vibrate independently of the rail system without loosening fittings over time. On ground-level slab installations, the rail anchors to the slab supporting the chiller.
The integral ladder for top access is structurally part of the enclosure, with a self-closing gate at the top. The technician climbs the ladder, steps through the gate onto the chiller top, and works inside a 42-inch OSHA-compliant perimeter.
What You Need Before You Start
- Tape measure, 25 ft minimum.
- Clipboard or phone for recording dimensions.
- Camera. A phone camera works.
- EquipGuard Measurement Worksheet, required for quoting.
- PPE appropriate for roof access at your facility.
Budget twenty minutes per chiller. Add ten minutes for each additional unit on the same roof to capture spacing between them.
How to Measure Your Chiller: The Five Inputs
1. Chiller make, model, and nameplate
Photograph the chiller's nameplate. The make and model tell us 90% of what we need to know about frame geometry. Trane RTAC, Carrier AquaForce, Daikin Trailblazer, York YVAA, Johnson Controls. Each manufacturer's frame design is documented, and the model number tells us the structural rail layout we will attach to.
Record the make, model number, and tonnage from the nameplate. If the nameplate is unreadable or the unit has been re-tagged, photograph the unit from all sides and let us know. We can usually identify the frame from the structural rail pattern.
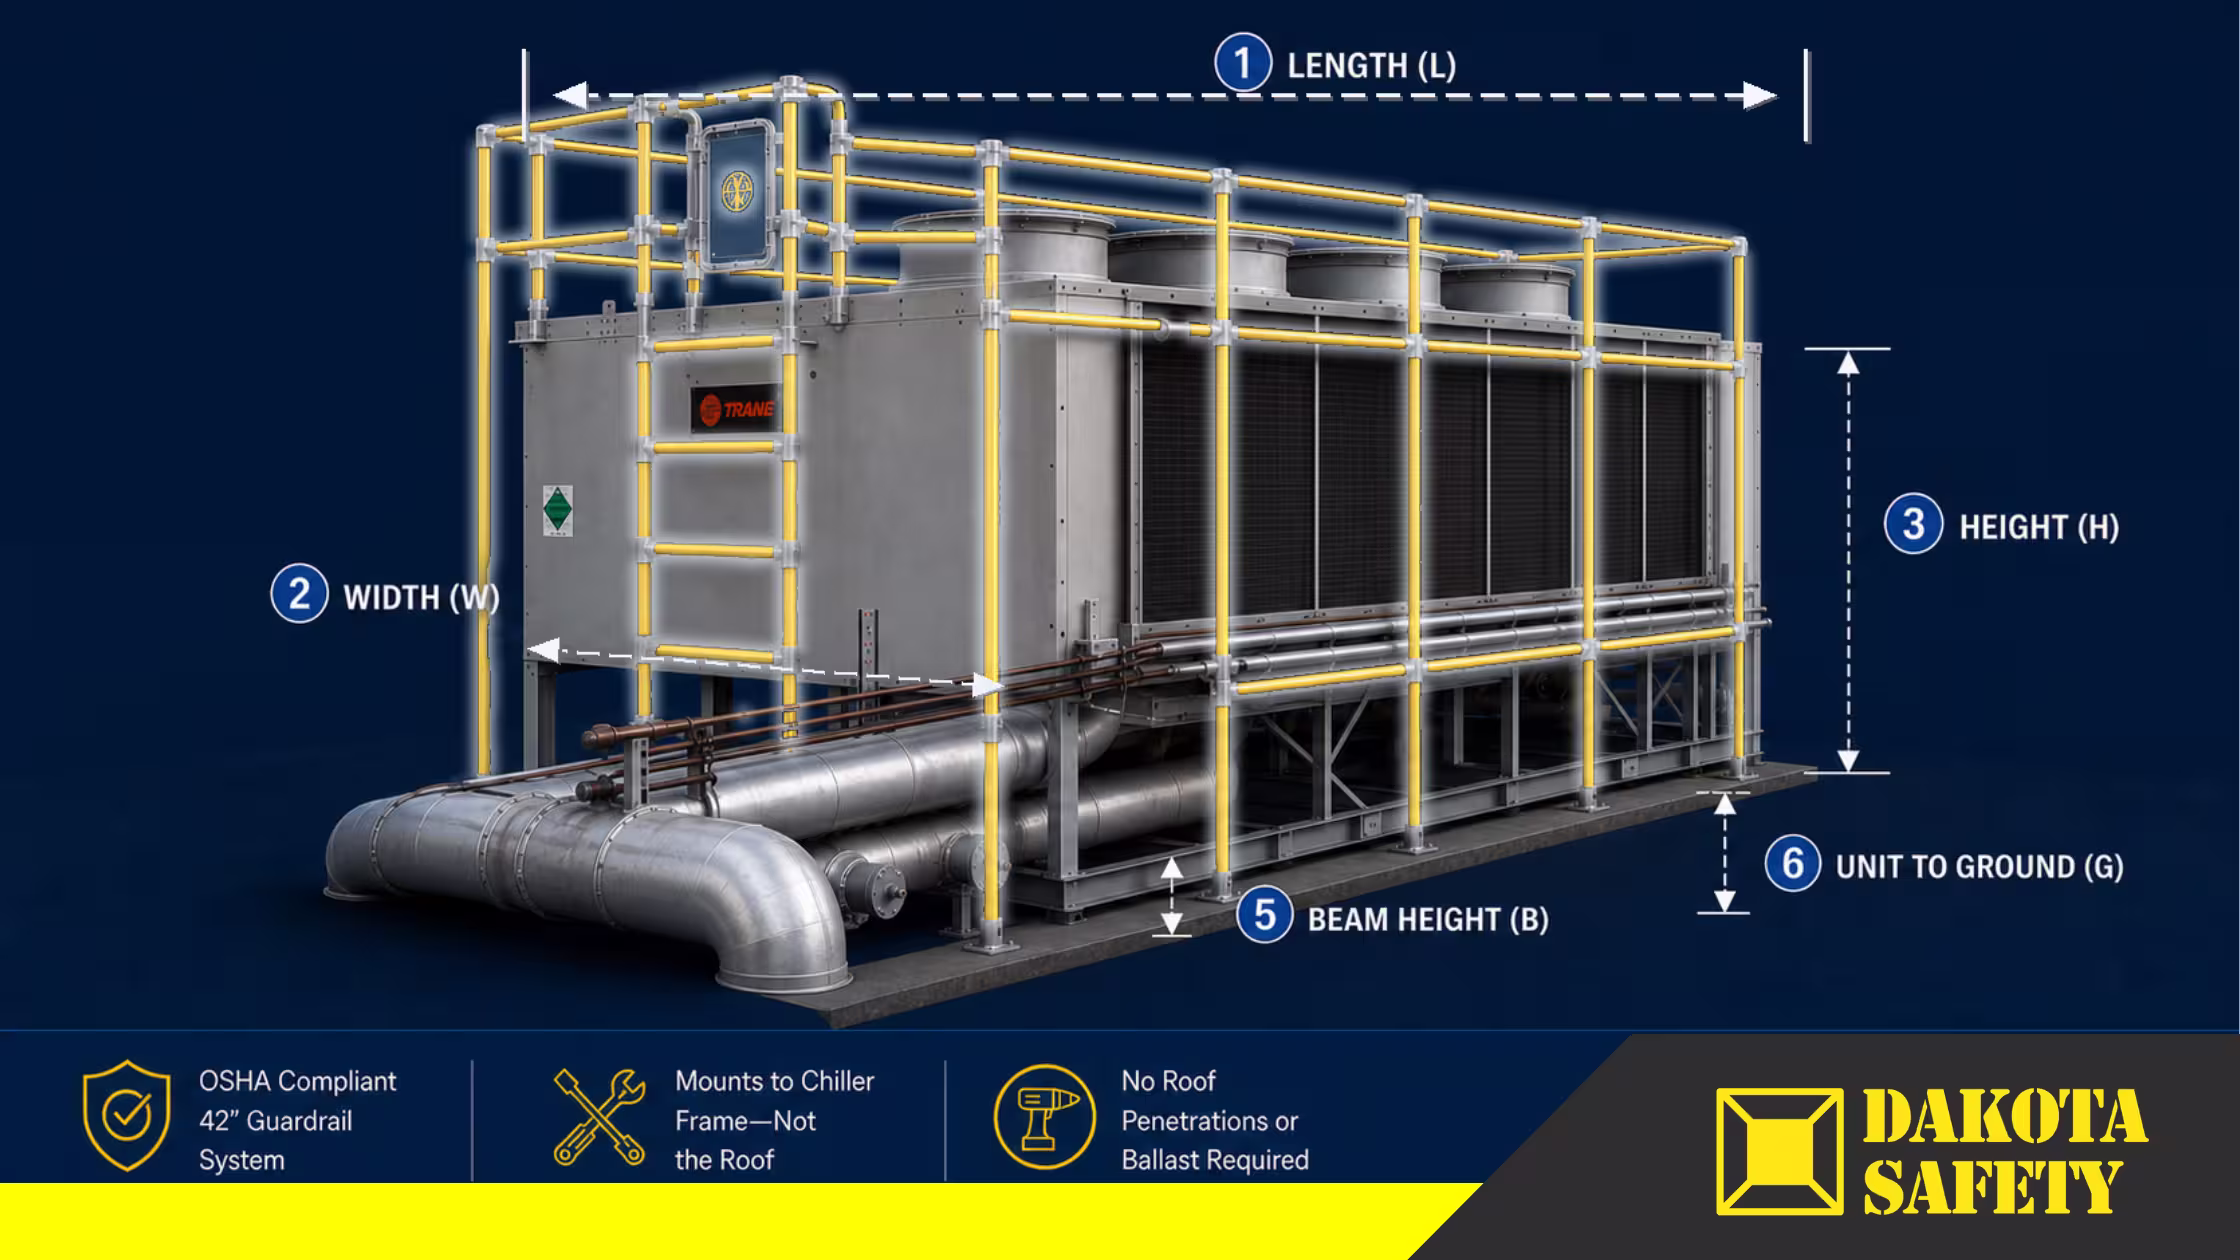
2. Overall chiller dimensions
Measure the chiller's overall footprint at its widest points, including protruding components: pipe connections, control panel housings, access doors in their open position, and aftermarket attachments.
Record length, width, and overall height to the nearest inch. The nameplate gives us baseline factory dimensions. Your measurements confirm what is actually there after installation.
3. Service access points
Walk around the chiller and identify every panel and access point a technician needs to reach during service: control panels, condenser access doors, refrigerant service points, fan motor access, electrical compartments, and any other panel opened during routine maintenance.
For each access point, note its location on the unit and whether the panel swings open, slides, or lifts. Take a photo of each access point.
4. Ladder placement location
EquipGuard includes an integral ladder for top access, with a self-closing gate. The ladder is structurally part of the enclosure, so its placement has to be decided during design.
Identify an open spot on a side without a control panel, refrigerant access point, or other service component the ladder would obscure. The ladder also needs adequate roof space at its base for safe approach.
5. Frame-mounted obstructions
Walk the perimeter of the chiller and identify anything attached to or routed along the structural frame that we need to design around: aftermarket pipe runs, conduit runs, supplemental brackets, isolation valves, or field modifications.
For each obstruction, note its location on the frame and approximate dimensions. The structural attachment brackets need clear access to the factory-rated rails.
Plus: photograph everything
Dimensions without photos require follow-up calls. Photos without dimensions require a site visit. Send both.
Take photos from all four sides, plus an overhead shot if you can safely get one. Photograph the nameplate, service access points, proposed ladder location, ladder approach zone, and every frame-mounted obstruction. Include a reference object, such as your tape measure, for scale.
Design reality: A guardrail that blocks the condenser access panel is a guardrail that gets removed. Service access points drive setback and configuration during design, so Dakota Safety positions the rail to clear every panel without blocking maintenance work.
Common Measurement Mistakes
Skipping the nameplate photo
The make and model unlock most of the frame geometry. Without the nameplate, we have to derive it from your photos, which adds review time.
Measuring the spec sheet
The spec sheet says 8 feet long. The installed unit with refrigerant lines, control panel housing, and aftermarket brackets is 9 feet 4 inches. Measure what is actually there.
Missing field modifications
The conduit bracket installed two years after startup does not appear on any drawing. Photograph it.
Skipping the photos
Every incomplete submission we receive is missing photos, not dimensions. Photos let us configure around your site-specific conditions.
When to Call Dakota Safety
You can measure most standard chillers yourself. A short consultation helps when the geometry is unusual, the frame is unclear, or multiple chillers need to work as one layout.
| Measure It Yourself If | Call Us First If |
|---|---|
| Your chiller is a standard rooftop or slab-mounted unit. | Multiple chillers need a combined or shared enclosure layout. |
| You have safe roof access and appropriate PPE. | The unit has been heavily modified and the original frame geometry is unclear. |
| The nameplate is readable and the unit is identifiable. | You are not sure how to identify the structural attachment rails. |
| You can photograph all sides, the nameplate, and every access point. | The chiller sits in a configuration that does not match standard rooftop or slab installation. |
Dakota Safety does not charge for measurement consultations. Call 866-503-7245.
What Happens After You Submit Your Measurements
1. Send the package
Send your completed worksheet and photos.
2. We review it
Dakota Safety reviews dimensions and contacts you if anything needs clarification.
3. Quote in 48 hours
Within 48 hours, you receive an EquipGuard configuration and quote.
4. Ready to install
The system ships ready to install with on-site cuts called out in the assembly drawing.
Submit Your Chiller Measurements
The EquipGuard Measurement Worksheet captures the five inputs above plus the photos we need to configure your enclosure. It is required for the quote, and it walks you through every input in order.
Send your completed worksheet and photos directly to Dakota Safety. Need a measurement consultation first? Schedule a call or call 866-503-7245.
Frequently Asked Questions About Measuring Chillers for Guardrails
Do I need a professional surveyor to measure my chiller for guardrails?
No. Measurements to the nearest inch are sufficient. The measurement process takes about twenty minutes per chiller with a standard tape measure. The make and model number from the nameplate gives us most of the frame geometry we need.
What if my measurements are off by a few inches?
Dakota Safety reviews every submission. If your measurements are within an inch or two of accurate, the configuration will still work because the design uses your measurements as the starting point, not the final spec. We will flag anything that needs re-measurement before quoting.
Does OSHA require guardrails around rooftop chillers specifically?
OSHA does not name chillers specifically, but 29 CFR 1910.28(b)(1)(i) requires fall protection for any walking-working surface 4 feet or more above a lower level. When a technician works on top of a chiller, the chiller-top working surface is typically 8 to 10 feet above the roof deck or slab, which triggers the standard. A guardrail enclosure is the highest-tier engineering control available for that exposure.
How much does an EquipGuard chiller enclosure cost?
Cost depends on the chiller footprint, the number of sides requiring protection, the gate and ladder configuration, and any site-specific modifications. Send your measurements for a detailed quote within 48 hours. EquipGuard is purpose-built for each chiller, so the quote reflects the actual configuration rather than a generic estimate.
Can I install EquipGuard myself, or do I need a contractor?
Many facility teams install EquipGuard themselves. The system is mechanically attached to the chiller's existing structural frame and does not require welding, roof penetrations, or specialized tools. A standard installation uses a drill and a band saw, with a two-person crew completing the work in a single day. Dakota Safety provides an assembly drawing and configuration guidance with every quote.
Will EquipGuard damage my roof or void my roofing warranty?
No. EquipGuard mounts to the chiller's structural frame, not to the roof membrane. The system does not penetrate the roof and does not require any roof-deck attachment. Installation involves no welding, no hot-work permits, and no heavy equipment on the roof. The roof warranty stays intact.
Will EquipGuard damage my chiller or void the chiller warranty?
No. The brackets attach to the chiller's factory-rated structural rails, not to the casing or the unit's roof panels. EquipGuard is engineered to integrate with chillers from major manufacturers including Trane, Carrier, Daikin, and Johnson Controls. The system is built to the specifications of each individual unit, so the configuration adapts to whatever chiller is on the roof without modifying the unit itself.
How long does it take to get a quote after I submit measurements?
Dakota Safety provides EquipGuard configuration and pricing within 48 hours of receiving your completed measurements and photos. Most quotes are returned the same business day.
0 comments
Stay informed
Subscribe to get all the fall protection news and updates
Unsubscribe at any time


